Tulle Covered Pattern Board
I'm finally able to get back to work on my Garden quilt.
I've been thinking about how I would get all the very small pieces, I have cut and fused, in place so I can get them in the correct place on my pattern.
I hope this idea works.
Since my design is a very intricate design and allot of the pieces are very small it was difficult for me to transfer them to the white cotton fabric, I'm using as back ground fabric, that I'm attaching my pattern pieces to.
I needed a way to see the pattern so I could get all the pattern pieces in the right place. So I decided to use bridal tulle.
I put tulle over the top of the pattern and tacked the top of the pattern and the tulle in place along the top of a foam core board.
Now I will be able to see my design and be able to put the cut out pattern pieces in place.
I used white bridal tulle laid on top of the pattern.
Next I'm going to fuse or glue each pattern piece in place.
I will be posting pics as I go along.
I'm either going to use a fabric glue stick or spray glue to attach each cut out pattern pieces in place on the top of the tulle.
Showing posts with label The Garden( Quilt). Show all posts
Showing posts with label The Garden( Quilt). Show all posts
Saturday, June 24, 2017
Finished Cutting All the Center
Pattern Pieces
I just finished cutting all the fabric pieces for the center of my quilt, I thought there were only going to be 36 pieces to cut and fuse but as it turned out I had to cut many more pieces than I thought I would. Happens sometimes.
Once I started cutting the pieces out I realized I wanted much more detail in each row and that meant cutting more pieces.
I divided the quilt into several rows and made the pattern piece one row at a time and put each row of pattern pieces in its own bag.
To keep track of the pieces I had to cut I penciled in the area with an orange pencil . each time I cut and fused a section of the middle area of the quilt.


Next I fused the freezer paper pattern to a chosen fabric and fused those to lightweight fusible web. I end up with a sandwich of fusible web, Fabric and freezer paper.
I placed each fused sandwich on the top of my homemade light table and drew around the edge of each pattern piece with a pencil and cut them out.

 * NOTE
To make my light table I used a shoe box I had on hand and taped the lid in place and cut around the inside top . Them I used duct tape on the edge of the top of the box . Next I took a small pane of glass that was light weight and the same size, as the top of the box and taped the edge so it would be smooth. .
I put a small push light in the bottom and ended up with a light table that I could sit in my lap and use to make my pattern pieces,
Cheap, easy to use.
With me sitting in a wheelchair this light table makes it easier for me to draw what ever I need to. It sure cuts down on the cost of a light table.
Lastly I put each row of pattern pieces in a plastic bag that I had marked with the row number and any extra information.

Pattern Pieces
I just finished cutting all the fabric pieces for the center of my quilt, I thought there were only going to be 36 pieces to cut and fuse but as it turned out I had to cut many more pieces than I thought I would. Happens sometimes.
Once I started cutting the pieces out I realized I wanted much more detail in each row and that meant cutting more pieces.
I divided the quilt into several rows and made the pattern piece one row at a time and put each row of pattern pieces in its own bag.
To keep track of the pieces I had to cut I penciled in the area with an orange pencil . each time I cut and fused a section of the middle area of the quilt.


I placed each fused sandwich on the top of my homemade light table and drew around the edge of each pattern piece with a pencil and cut them out.


To make my light table I used a shoe box I had on hand and taped the lid in place and cut around the inside top . Them I used duct tape on the edge of the top of the box . Next I took a small pane of glass that was light weight and the same size, as the top of the box and taped the edge so it would be smooth. .
I put a small push light in the bottom and ended up with a light table that I could sit in my lap and use to make my pattern pieces,
Cheap, easy to use.
With me sitting in a wheelchair this light table makes it easier for me to draw what ever I need to. It sure cuts down on the cost of a light table.
Lastly I put each row of pattern pieces in a plastic bag that I had marked with the row number and any extra information.


Monday, June 12, 2017
Cutting and Fusing Fabric
Today I'm cutting and fusing the fabric pieces for the center of the quilt.
 In the first photo I've ironed the freezer paper pattern to the front of the fabric I've chosen for the gravel drive way. I have folded back the freezer paper so the fabric can be seen. I've fused fusible web to the back of the fabric

In this photo I've taken a straight pin and used it to make a tear line in the fusible web paper on the back of the fabric to expose the back of the fabric where the fusible web glue is located.
It will take two to three days to finish this process. there are 36 pattern pieces to be prepared.

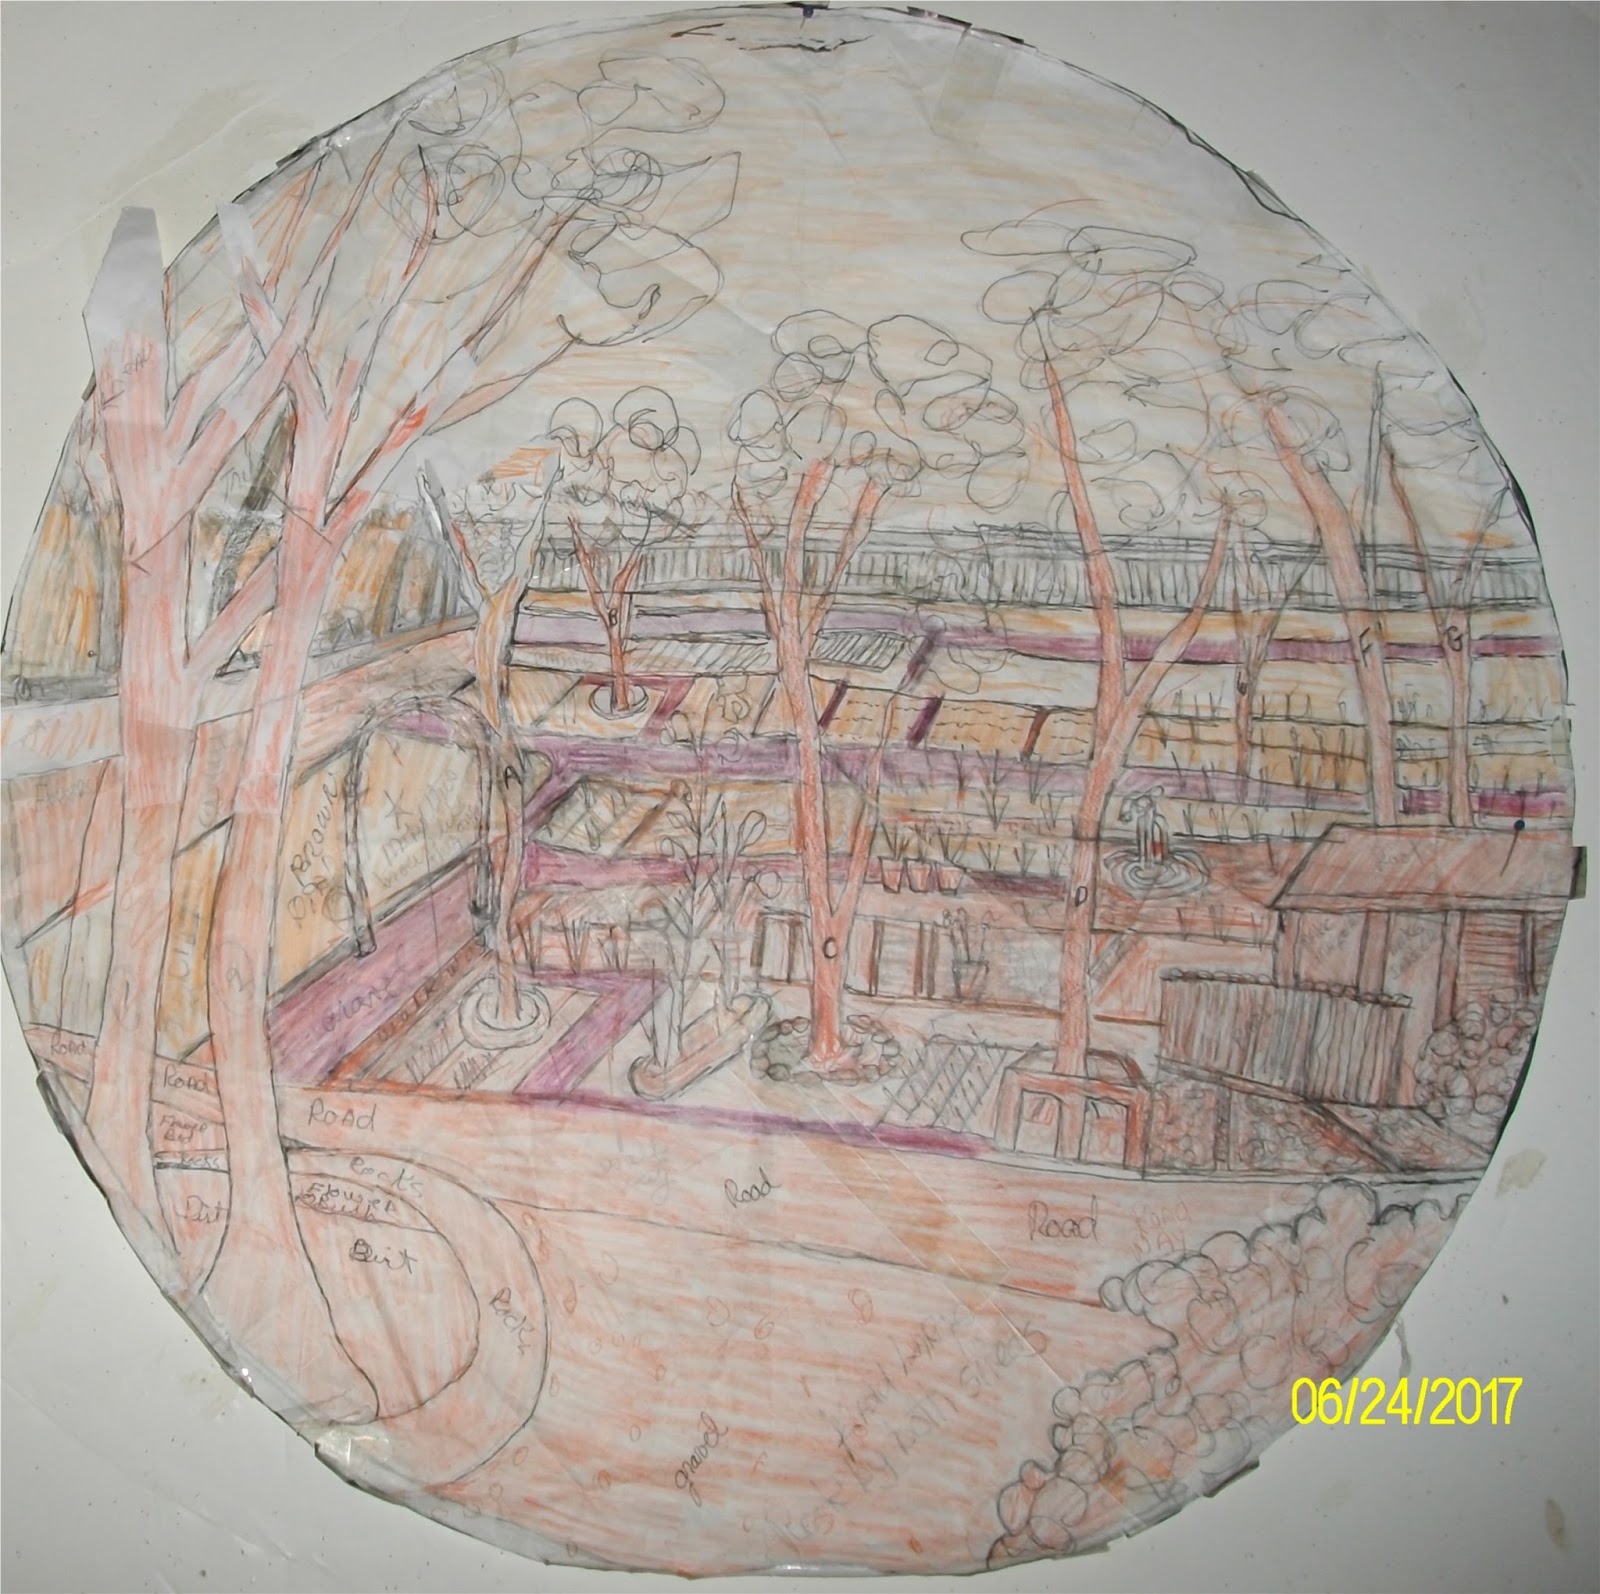
In this last picture I've done a black line drawing of the middle section of the quilt. Each time I finish a pattern piece I mark the area off using an orange color pencil. This helps me keep track of the pieces I've done and to help me see if I've forgotten to cut out a pattern piece so I can make one if I missed making one. I'm hoping to get 12 pieces done each day. It is labor intensive so I have to take a break in between each set of twelve.
Today I'm cutting and fusing the fabric pieces for the center of the quilt.


In this photo I've taken a straight pin and used it to make a tear line in the fusible web paper on the back of the fabric to expose the back of the fabric where the fusible web glue is located.
It will take two to three days to finish this process. there are 36 pattern pieces to be prepared.

In this last picture I've done a black line drawing of the middle section of the quilt. Each time I finish a pattern piece I mark the area off using an orange color pencil. This helps me keep track of the pieces I've done and to help me see if I've forgotten to cut out a pattern piece so I can make one if I missed making one. I'm hoping to get 12 pieces done each day. It is labor intensive so I have to take a break in between each set of twelve.
Thursday, June 8, 2017
NEW QUILT
GARDEN QUILT
I've decided to work on a couple of quilts and a new bag design in the next few days.
Here are a few pictures of my Garden Quilt design .
I have 36 pattern pieces cut and I have my fabric sorted out along with my fusible web.
I'm going to spend the day getting my fabric pieces cut out for the center of the Garden Quilt today.
I'll post photos of the other two projects, I mentioned, once I have my designs finished and patterns cut.
PHOTOS:
The first photos is my black and white design. Second photo is my design drawn of cellophane paper which is then pinned on top of my base fabric of white cotton. Third photo is a picture of some of the freezer paper pattern pieces I'll use to cut out the , 36,fabric pieces for the middle of the quilt.


GARDEN QUILT
I've decided to work on a couple of quilts and a new bag design in the next few days.
Here are a few pictures of my Garden Quilt design .
I have 36 pattern pieces cut and I have my fabric sorted out along with my fusible web.
I'm going to spend the day getting my fabric pieces cut out for the center of the Garden Quilt today.
I'll post photos of the other two projects, I mentioned, once I have my designs finished and patterns cut.
PHOTOS:
The first photos is my black and white design. Second photo is my design drawn of cellophane paper which is then pinned on top of my base fabric of white cotton. Third photo is a picture of some of the freezer paper pattern pieces I'll use to cut out the , 36,fabric pieces for the middle of the quilt.


Thursday, May 18, 2017
SAFETY PINNING TEMPLE QUILT
I've finished pinning my quilt sandwich together. This includes the quilt, batting and background fabric.
I'm going to start doing free- motion stitching today over the surface of the quilt and then once I'm finished with the stitching I'll iron the piece.
I lay parchment paper on top of the quilt and use a warm iron to iron the surface of the quilt. I will avoid ironing the tree because I want it to stand out and not get flattened to much.
I will be adding silk flowers and cotton fabric leaves to the tree on the right side of the quilt next.
I use curved safety pins to hold the three layers together. I place them about a hands width apart over the surface of the quilt .
I used acrylic paint to paint the surface of the fabric I used for the tree and I've used fabric glue to hold the vine in place. I had to change the color of the trunk of the tree because the fabric I first used was to dark and the tree disappeared into the background.
I just started sewing the trucks of the trees on the top portion of the quilt.

I've finished pinning my quilt sandwich together. This includes the quilt, batting and background fabric.
I'm going to start doing free- motion stitching today over the surface of the quilt and then once I'm finished with the stitching I'll iron the piece.
I lay parchment paper on top of the quilt and use a warm iron to iron the surface of the quilt. I will avoid ironing the tree because I want it to stand out and not get flattened to much.
I will be adding silk flowers and cotton fabric leaves to the tree on the right side of the quilt next.
I use curved safety pins to hold the three layers together. I place them about a hands width apart over the surface of the quilt .
I used acrylic paint to paint the surface of the fabric I used for the tree and I've used fabric glue to hold the vine in place. I had to change the color of the trunk of the tree because the fabric I first used was to dark and the tree disappeared into the background.
I just started sewing the trucks of the trees on the top portion of the quilt.

Monday, May 15, 2017
Quilt Taking Shape
Here are photos of the quilt I'm doing.


The next step in my process is free motion stitching over the surface of the quilt . I will remove the pins from the vine on the tree and stich it in place. I made the vine with a zig- zag stich and yarn.
Next I will add flowers and leaves to the tree on the right side of the quilt. I hand painted the tree.
The last things I will need to do is square up the quilt add binding and hanging sleeve.
Here are photos of the quilt I'm doing.


The next step in my process is free motion stitching over the surface of the quilt . I will remove the pins from the vine on the tree and stich it in place. I made the vine with a zig- zag stich and yarn.
Next I will add flowers and leaves to the tree on the right side of the quilt. I hand painted the tree.
The last things I will need to do is square up the quilt add binding and hanging sleeve.
Wednesday, May 3, 2017
TEMPLE QUILT UPDATE:
I've been cutting material for the quilt for a few days now and I'm almost finished.
After the fabric pieces are cut I pin them to the background fabric.
Once I have everything pinned down I will spend the day gluing all the cut fabric pieces in place.
I want to make a fabric tree to go in the foreground of the quilt. I think I will make it a separate stand alone piece and add it to the quilt after I'm finished gluing my cut fabric down.
Here are a few pictures of the quilt showing how far I've gotten so far.
After all the pieces are glued in place and dry I will do some surface stitching over the surface of the quilt to hold things in place.


I've been cutting material for the quilt for a few days now and I'm almost finished.
After the fabric pieces are cut I pin them to the background fabric.
Once I have everything pinned down I will spend the day gluing all the cut fabric pieces in place.
I want to make a fabric tree to go in the foreground of the quilt. I think I will make it a separate stand alone piece and add it to the quilt after I'm finished gluing my cut fabric down.
Here are a few pictures of the quilt showing how far I've gotten so far.
After all the pieces are glued in place and dry I will do some surface stitching over the surface of the quilt to hold things in place.


Tuesday, March 14, 2017
Next:
This is my design drawn on cotton fabric. I used my homemade light table to get the drawing transferred on to the sheet of cloth and I fused the cloth to freezer paper.
In the next photo I've fused the cloth to fusible web and ironed them together . I use parchment paper , that can be gotten in most grocery stores, to put on the top of the fabric/fusible web and iron it for about ten seconds.
When I iron these together I move the iron across the fabric lifting the iron up and down as I go across the surface.
It will take me a several hours to get this done for all the freezer paper pattern I cut out.


This is my design drawn on cotton fabric. I used my homemade light table to get the drawing transferred on to the sheet of cloth and I fused the cloth to freezer paper.
In the next photo I've fused the cloth to fusible web and ironed them together . I use parchment paper , that can be gotten in most grocery stores, to put on the top of the fabric/fusible web and iron it for about ten seconds.
When I iron these together I move the iron across the fabric lifting the iron up and down as I go across the surface.
It will take me a several hours to get this done for all the freezer paper pattern I cut out.



Back to the Quilt
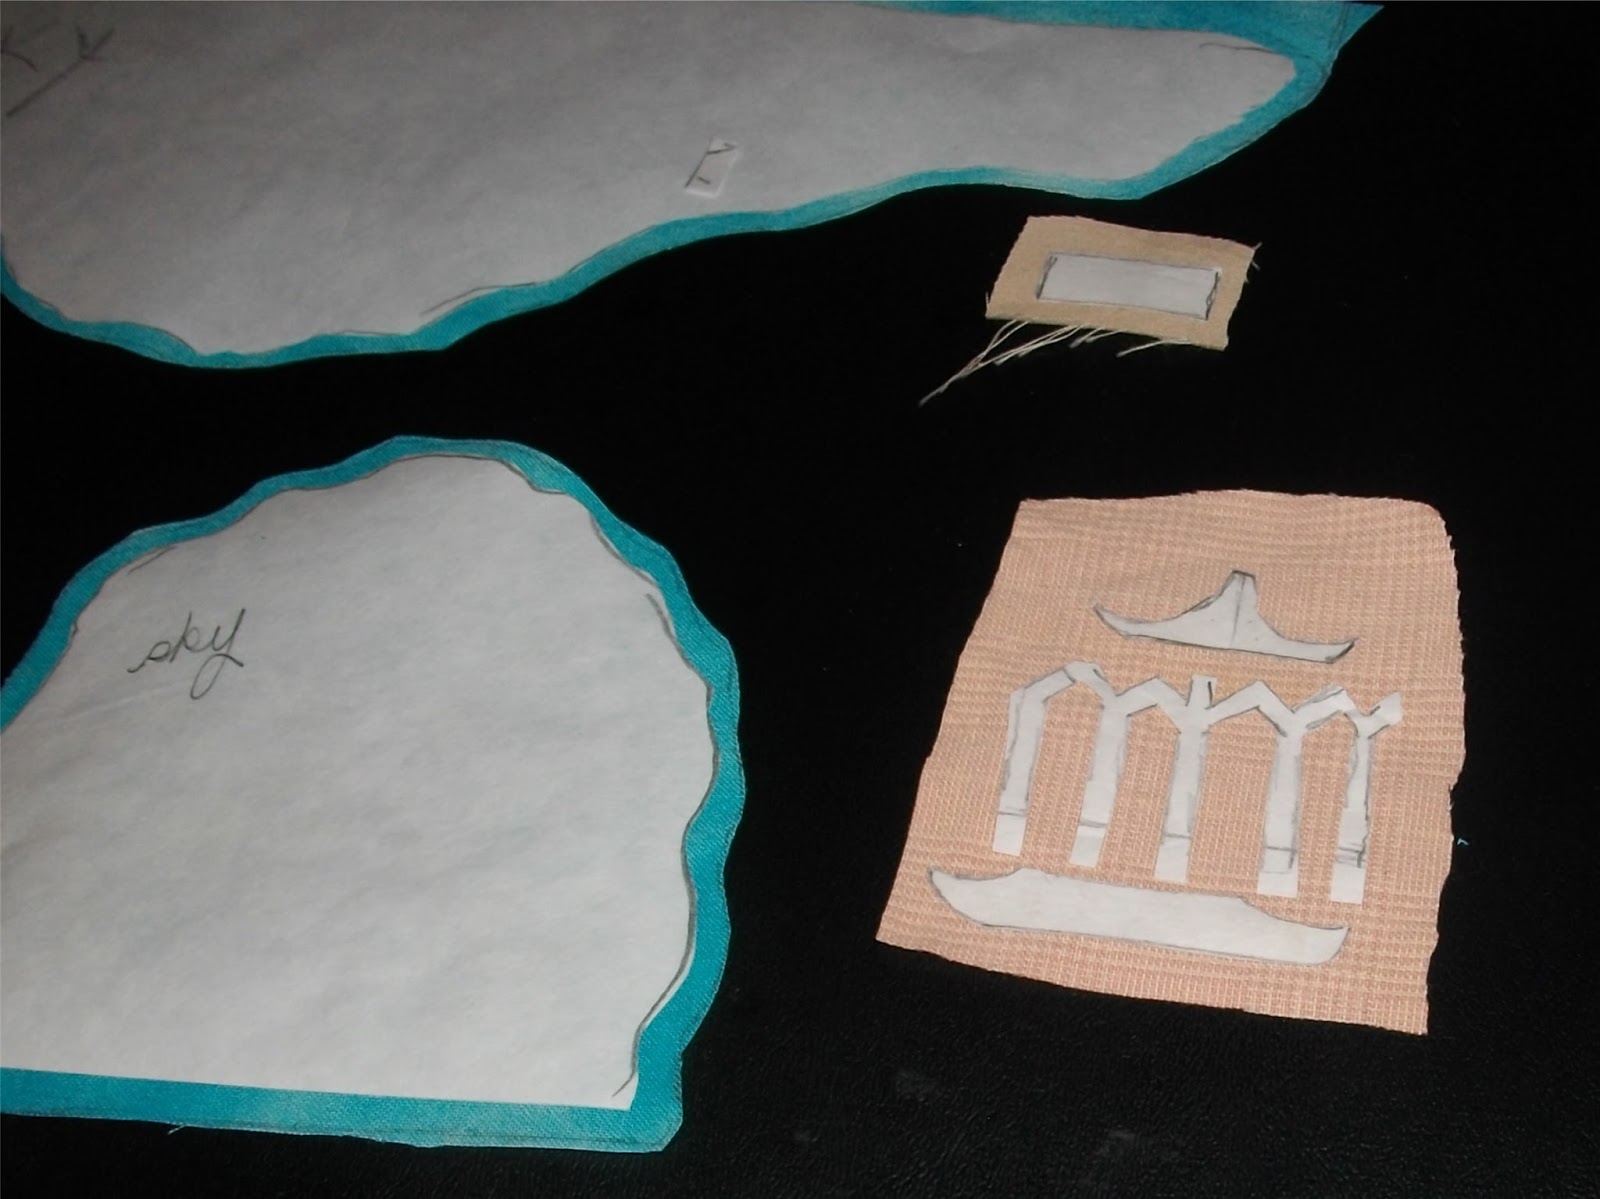
I'm finally getting to write after a few days delay to take care of some family matters. I have been able to get all my freezer paper pattern pieces trimmed and I've started fusing the fabric and pattern pieces together so I can fuse the pattern back with fusible web . Then I can cut out the fabric for the temple and sky etc, and be ready to fuse it to the fabric I've drawn my quilt design on.
Here is a pic of the fabric , freezer paper pattern Ironed together.

I'm finally getting to write after a few days delay to take care of some family matters. I have been able to get all my freezer paper pattern pieces trimmed and I've started fusing the fabric and pattern pieces together so I can fuse the pattern back with fusible web . Then I can cut out the fabric for the temple and sky etc, and be ready to fuse it to the fabric I've drawn my quilt design on.
Here is a pic of the fabric , freezer paper pattern Ironed together.


Monday, November 14, 2016
Border con:
I have just finished sewing the border blocks together and pinning them to my work board to see if it would fit. It fits perfectly. Oh I'm thrilled.
Now I can start on the middle section of the quilt tomorrow.
Lots to do this week. Im glad I can work. It is helping get my mind off things that are getting me a little uncomfortable.
Here is a pic of my work board with border pinned in place.

I have just finished sewing the border blocks together and pinning them to my work board to see if it would fit. It fits perfectly. Oh I'm thrilled.
Now I can start on the middle section of the quilt tomorrow.
Lots to do this week. Im glad I can work. It is helping get my mind off things that are getting me a little uncomfortable.
Here is a pic of my work board with border pinned in place.

Border:
I just finished arranging the border blocks for my quilt.
I will sew them together in a few minutes and start to work on the middle of the quilt.
 The second photo is the front of one of the bags I'm working on. I will be making five medium size bags with different animals etc. on the front . I've chosen ( a eagle, bear, deer. wolf and turtle) motif for each. I will do a small size and a large size and I will be making another set of microwavable bowls using the same designs. I'm also thinking about doing a messenger bag size bag that will be geared more toward men. It took me a few days to make all my patterns and get them cut out of cardboard. I use my empty tea and cereal boxes for my patterns. Here is a picture of my patterns.
 You can see the three different sizes I'll be using for my bags. I've also decided to make a Camouflage angel on some of the bags.
I'll post a pic of the angel design once I get one cut out and placed on its background fabric.
 I had so sad news this last week both our quilt shop/ craft stores are closing in my community .
I was able to get a few pieces of batik fabric. What was the worse thing to me was the fact that one of the shops had the largest collection s of batik fabric in Northern California in my opinion.
Here is a pic of one of the fabrics I bought I'm going to use it to make the leave on the tree in the background area of my quilt.
It's perfect to represent sun light through the leaves. Here is a photo of the fabric.

I just finished arranging the border blocks for my quilt.
I will sew them together in a few minutes and start to work on the middle of the quilt.


I'll post a pic of the angel design once I get one cut out and placed on its background fabric.

I was able to get a few pieces of batik fabric. What was the worse thing to me was the fact that one of the shops had the largest collection s of batik fabric in Northern California in my opinion.
Here is a pic of one of the fabrics I bought I'm going to use it to make the leave on the tree in the background area of my quilt.
It's perfect to represent sun light through the leaves. Here is a photo of the fabric.

Tuesday, November 1, 2016




Border Blocks
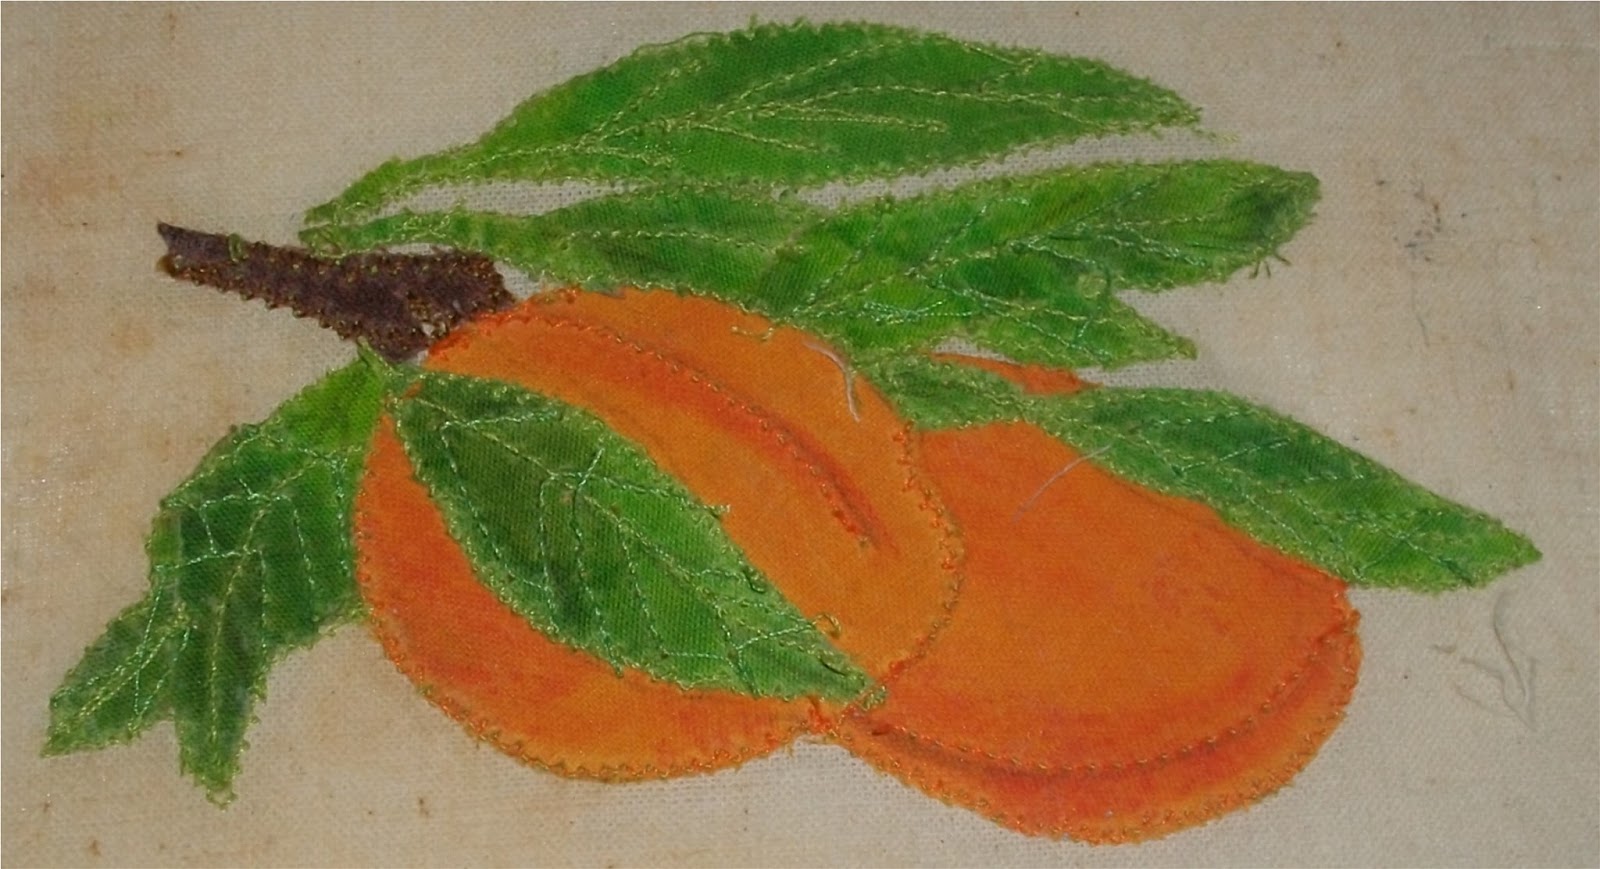
I finished the border blocks today. It took me three days to do some hand stitching and machine stitching on each block. I used cotton embroidery floss and cotton machine thread for the blocks.
Im going to spend a few days working on some fabric bags . I need to get them ready for sale for the holidays. I will post pics of each bag as I'm working on them
Here are six photos of the border blocks.
1. Blackberries
 2.Potatoes
 3. Figs
 4.Beets


6.Lettuce

I finished the border blocks today. It took me three days to do some hand stitching and machine stitching on each block. I used cotton embroidery floss and cotton machine thread for the blocks.
Im going to spend a few days working on some fabric bags . I need to get them ready for sale for the holidays. I will post pics of each bag as I'm working on them
Here are six photos of the border blocks.
1. Blackberries


5.Carrots


Sunday, September 25, 2016
Update:
I just finished cutting out the patterns for the center of the quilt I'm making. I also had a request for a mini wall hanging from some one who is a base ball fan.
Here is my design.

I'll have to glue all the pieces down and make sure they are aligned properly and then I will machine stitch all of the pieces of the design in place and put a bias cut border around the edge of the wall hanging.
These are some of the patterns for the center design of the quilt. I use freezer paper to make my patterns because I am able to iron them to my fabric so I can
mark the design on the fabric. I use Terial Magic, which is a wonderful product to stabilize my fabric. It helps keep the fabric stiff and helps me get a clean line when I mark the fabric before cutting out each pattern piece.

I have also finished my black line drawing on clear cellophane of the center design. This helps me with placement of each piece of fabric. I lift the cellophane to place each piece of fabric . The next step is to chose the fabric for each part of the design.


I just finished cutting out the patterns for the center of the quilt I'm making. I also had a request for a mini wall hanging from some one who is a base ball fan.
Here is my design.

I'll have to glue all the pieces down and make sure they are aligned properly and then I will machine stitch all of the pieces of the design in place and put a bias cut border around the edge of the wall hanging.
These are some of the patterns for the center design of the quilt. I use freezer paper to make my patterns because I am able to iron them to my fabric so I can
mark the design on the fabric. I use Terial Magic, which is a wonderful product to stabilize my fabric. It helps keep the fabric stiff and helps me get a clean line when I mark the fabric before cutting out each pattern piece.

I have also finished my black line drawing on clear cellophane of the center design. This helps me with placement of each piece of fabric. I lift the cellophane to place each piece of fabric . The next step is to chose the fabric for each part of the design.


Thursday, September 15, 2016
The Garden Quilt con.
Here are photos of the Lettuce, Onion , Carrots and Green Beans.
Each part of the applique is a cotton fabric , fused to paper backed fusible web. I then fuse the pieces in place and finally add machine embroidery on the surface of each . Some of the sections I painted using fabric paint. and the onion was made by layering fabric together.
I will be doing some surface stitching on each block and then stitch all the blocks together . This border will be sewn onto the center design once I'm finished putting it together.


Here are photos of the Lettuce, Onion , Carrots and Green Beans.
Each part of the applique is a cotton fabric , fused to paper backed fusible web. I then fuse the pieces in place and finally add machine embroidery on the surface of each . Some of the sections I painted using fabric paint. and the onion was made by layering fabric together.
I will be doing some surface stitching on each block and then stitch all the blocks together . This border will be sewn onto the center design once I'm finished putting it together.


Subscribe to:
Posts (Atom)